Welcome to Day 27 of my month long series “How to Organize Your Kitchen Frugally in 31 Days”. Every day during the month of October I will be sharing an organized space in my kitchen with you. My goal is to inspire you and give you ideas on how you can organize your kitchen.

I told you in the introduction to this series why I’m embracing my outdated kitchen and choosing to be thankful for what I have. Even though my kitchen is very outdated, one of my favorite parts of it is the pantry.
I didn’t grow up in a home that had a pantry, nor did I have one in either of the kitchens where I have lived previously. So, I’ll start this post by saying that if you don’t have a pantry, I hope you can choose to be thankful for what you do have. Today I’m going to show you how I maximized the space in my pantry to make it work efficiently.
If there is one thing I do not like, it’s deep closet shelves! In my opinion, it’s a sure fire way to lose things and have no idea of what you own. Deep pantry shelves are no exception.
When we first bought our home, the pantry had two very deep shelves at eye level and above, and some narrow shelves on the side wall. We installed some adjustable brackets and added shelves along the back wall, but they overlapped the existing side shelves. We gained more shelf space, but added a headache in the corners where the shelves overlapped.
The whole pantry was a mess and was driving me crazy. With six people in my family, it was just too easy for the mess to take over because of the lack of intelligent organization.
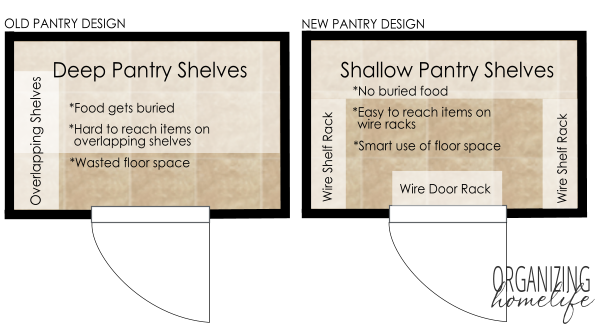
I asked my hubby to cut the deep shelves way back so they were only about 13″ deep. Shelves between 12″-14″ are a great depth. Once you start getting deeper than that, it becomes too easy for things to get buried.
But even with the shelves cut back, I just wasn’t making the best use of the space. Many closets are filled with deep shelves. But did you ever realize how much useable space there would be if you cut the shelves back and used the side walls and back of the door?
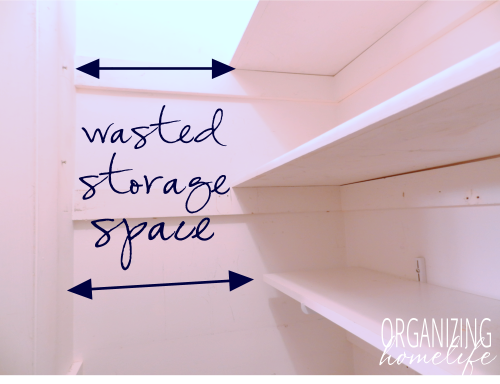
You can see in the picture above that there were wood supports holding the existing shelves that we cut back. When I looked at the design and thought about what we could do to maximize the space, I realized that we needed to take out those supports and use the wall space.
Since I wasn’t blogging when some of these changes took place, I generally didn’t take pictures of a space before I reorganized it. 😉 So I made a little graphic to better explain the changes I made to make the most of the space.
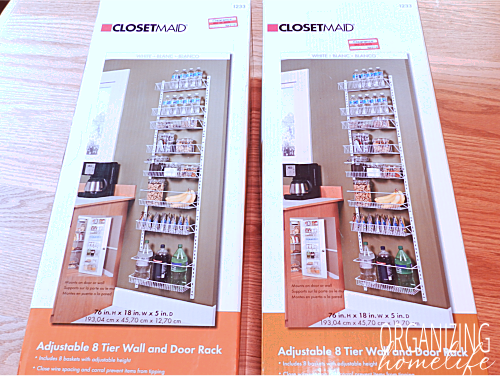
I went to Target in search of adjustable wire rack units and hit the jackpot! They were in the process of remodeling the store and were clearing out merchandise in the home organization department. I found these two ClosetMaid wire racks for $17 each!
I had previously purchased an over the door elfa unit from the Container Store and put that on the back of the door.
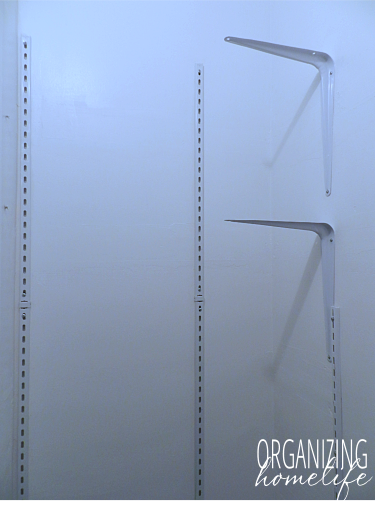
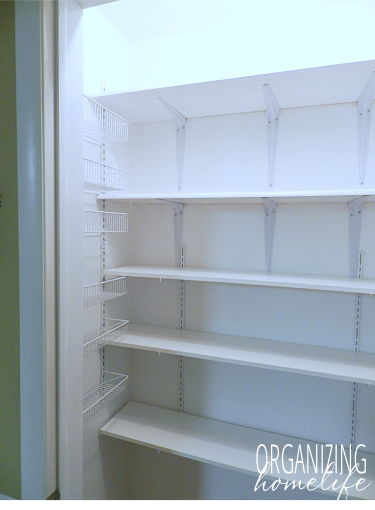
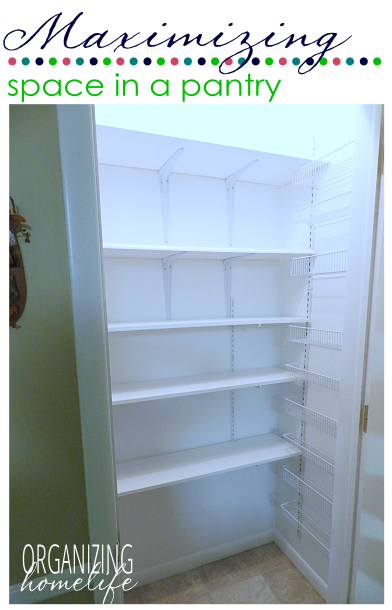
We removed the wooden supports, gave the pantry a fresh coat of paint, and installed some metal “L” brackets to hold up the old wooden shelves. They aren’t the prettiest, but I knew they would be hidden behind the food, and my goal was to keep this pantry reorganization on a small budget.
Here is what the left side of the pantry looks like now:
And the right side:
Tomorrow I’ll show you how I put it all together and organized the space effectively.









I so wish I had a pantry. This has given me an idea though to take a closet that I have in my laundry room and turn it into a pantry. Right now it is just filled with clothes that no one EVER wears…..I have so enjoyed your series. You are so down to earth and have really given me lots of practical, inexpensive ideas. I have a pretty good Wish List going on at Amazon, thanks to you 🙂
I love this idea! Such a great way to add more space. Excited to see the results!
I wish I could redesign mine. My pantry is a cabinet not a closet. Half of it is drawers, which I like but the other half is a cabinet above the drawers. I use the top 2 for storing platters/bowls etc. that I do not use very often. But the other we use for pantry items. Things get so lost it. It is around 19 inches deep and 48 inches long. I am thinking about some bins to put in there so it will be easier to get to the things in the back. Maybe one day when my rich uncle gets out of the poor house I will invest in some drawer inserts. lol
I have this exact problem, and I was so happy to see that you addressed it in your kitchen! I showed it to my husband and told him to get busy! haha.
Your kitchen reorganization posts have been so informative and enjoyable. THANK YOU!
Just love every one of your blog posts! They are so economical and practical as well as beautiful. Keep them coming! Thanks so much!
Ah! I love it Ginny! Can’t wait to see what you’ve done with your newly found extra cabinet and floor space.
I’m enjoying your kitchen organization series.
You’ve encouraged me to “own” and be thankful for my current kitchen. Even small organizational and inexpensive changes really seem to make a difference.
Hello! I liked your blog about maximizing pantry space, thanks. Can you tell me the dimensions of your pantry? Best Regards, Ingrid.
Hi there! I am trying to talk my husband into a similar pantry remodel…we are trying to see if it would work for our pantry. Could you share the dimensions of your pantry? Just want to get an idea if this could potentially work for us. Thanks in advance…love all of your organization ideas! 🙂