If you’ve been following my blog for a while, you may remember when we discovered a “minor” leak in our bathroom. Some of the tiles under the faucet had developed hairline cracks and started pushing in.
It turned out, they were getting pushed in because the wall behind them was disintegrated. Water had found its way to the other side of the tile and ruined the wall. The rest of the tiles were in good shape, and we hadn’t planned on a major bathroom renovation, so we decided to take the tiles off of the wall right around the faucet area, fix the wall, and reattach the tiles. But…
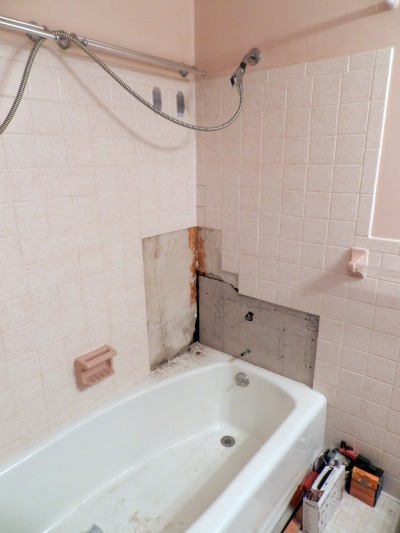
After removing a few extra tiles, we discovered that the damage had not been limited to the area around the faucet. Our home is in very good condition and was well maintained by the previous owners, but the fact is: it’s getting older. We already had a pretty long list of updates and projects on the to-do list, but remodeling the bathroom was not on it!
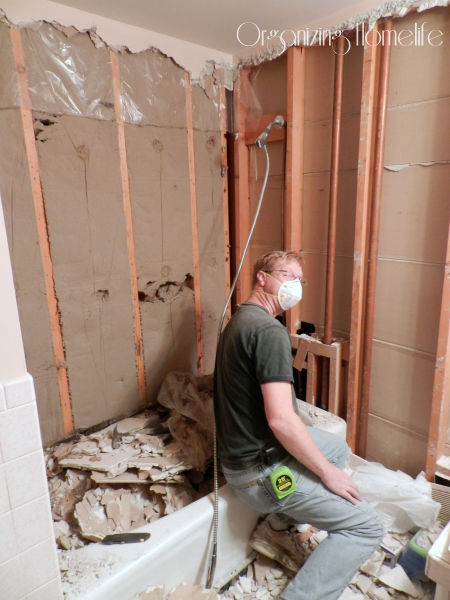
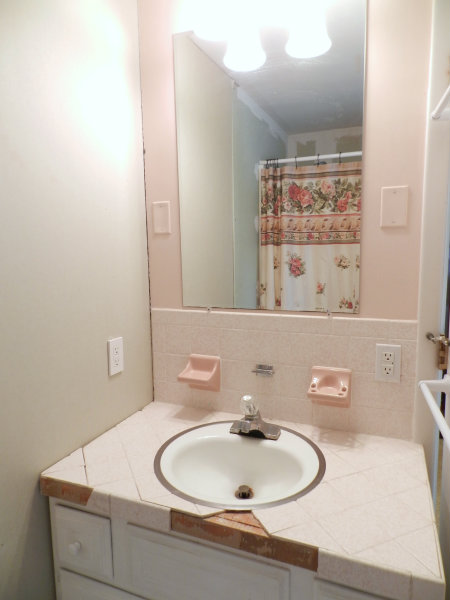
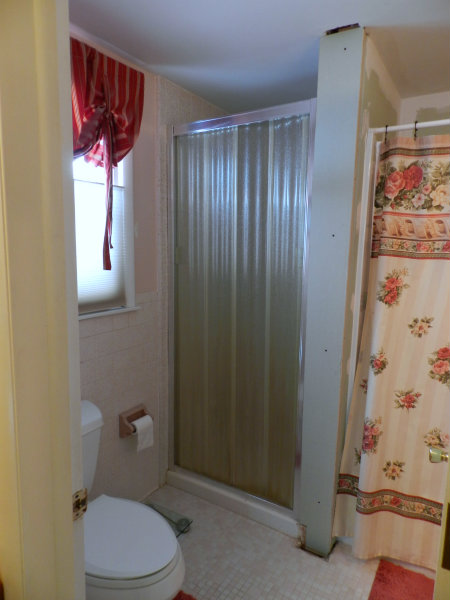
I have lived in homes with uglier bathrooms before, so although it wasn’t decorated according to my tastes, it was something I could live with. I didn’t like the pink speckled tile, the 1960’s chipped enamel sink with the rusty spot on the drain, or the tiled countertop, but the one thing I really disliked was the layout. (FYI – The tile didn’t actually start breaking off of the sink until we pounded out the tile on the wall. It looked bad, but not “quite” this bad).
Here is the outside view of the bathroom from our hallway:
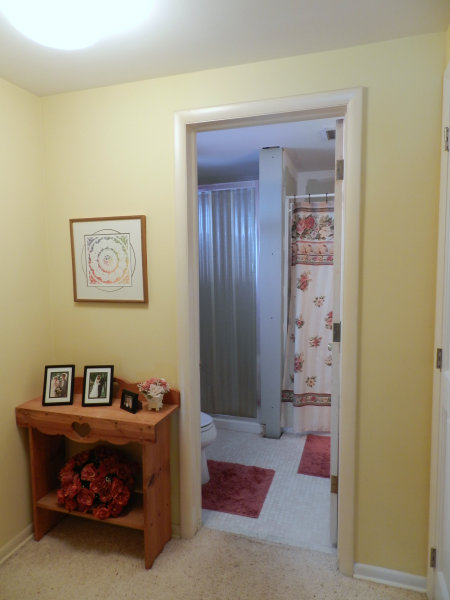
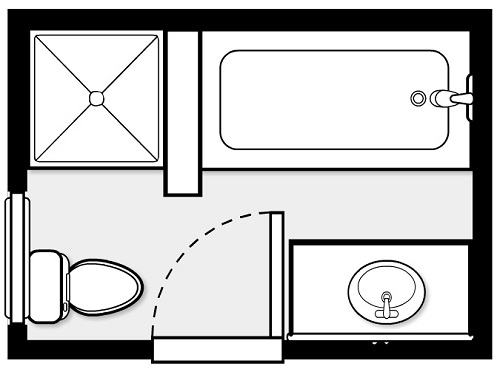
The door barely clears the toilet and makes the space by the sink and tub feel crowded, not to mention blocking the light from the window.
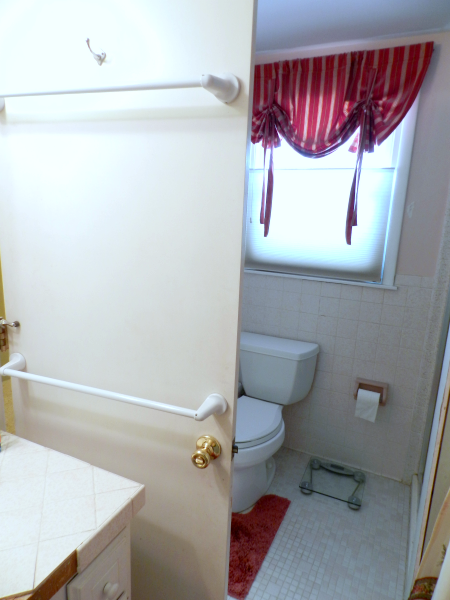
The previous owners installed the stand alone shower next to the bathtub in the early 1980’s. Although it’s once again in vogue to have a stand alone shower and a separate tub, this just didn’t seem to be a practical use of space in this bathroom. As I mentioned, it’s an older home, so there is no master bath. Therefore, our entire family uses this bathroom. It can get pretty crowded with six people trying to get ready in the morning!
When I was growing up, I dreamed of becoming an interior designer. Although my interests changed over the years, I have always had a love for design. So, this “problem” that happened with the leak was actually a secret release for something I’ve dreamed of for years!
I had already envisioned the solution to the bathroom long before I knew of any problems, but I knew what I was envisioning was far out of our reach. I’m talking: walls down, tile out, plumbing moved, etc. So I had to get creative.
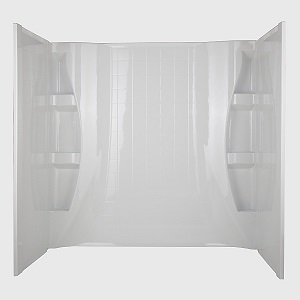
My hubby and I discussed our finances and decided that a tub surround was the best solution for phase one of our bathroom reno. It was fairly inexpensive at about $200, it solved the leak, added shower storage, and freed me from the necessary evil of scrubbing grout in the shower (one of my least favorite chores!). We found this surround at Lowe’s and loved it.
After removing all the tile from around the tub and side wall,
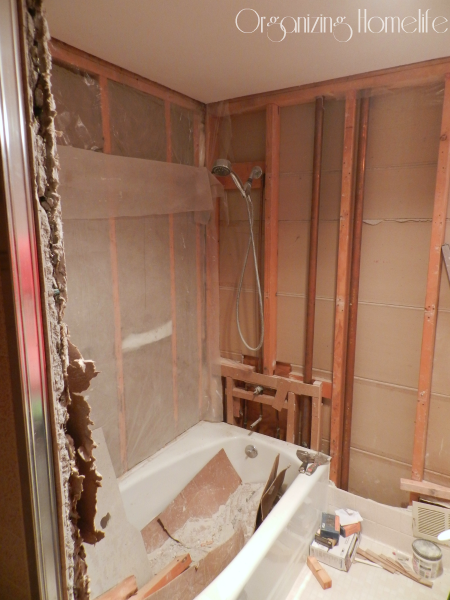
putting up new drywall,
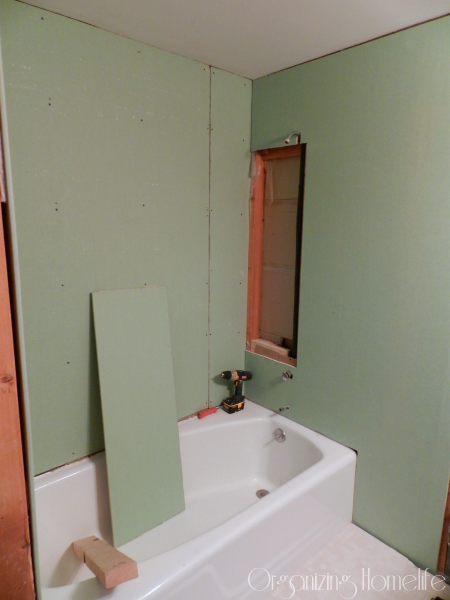
and installing the new tub surround, we started our new task: saving our pennies! I know it’s not an ideal way to renovate, but we didn’t want to go into debt, so we decided we could live with a half-done bathroom for a little while. That “little while” turned into a year. I’m not going to lie…I started to get very tired of looking at drywall after a few months! But, being debt-free was more important to me.
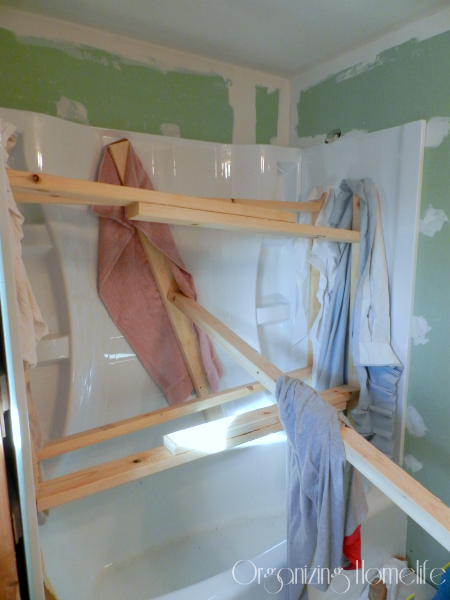
The installation was pretty straightforward, but got a little interesting trying to maintain constant pressure on the adhesive. We wrapped old towels and rags around 2 x 4’s to prevent scratching and kept the pressure on for 24 hours. It worked great!
God has blessed us in so many ways, and I knew he would provide for us. We decided to do most of the work ourselves to keep it affordable, and after a year of saving, we are finally up to finishing this reno! Whoot!
Here is the original floor plan:
And this is my new plan:
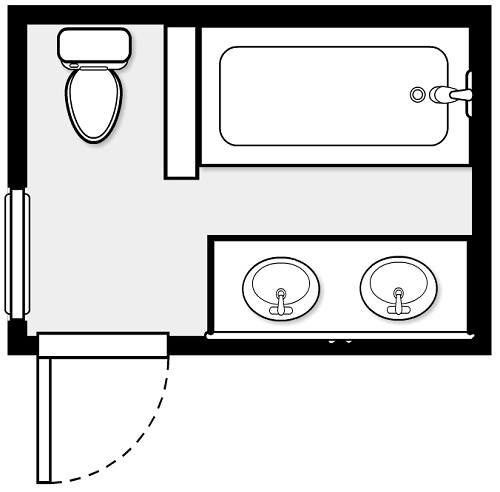
Getting rid of the stand alone shower, moving the toilet, changing the location of the door and the direction in which it opens, will allow for so much more space and light in the bathroom. Plus, we won’t have to fight over one sink and mirror (at least not quite as much ;))! We have a nice sized landing at the top of the stairs in the hallway, so having the door open out will not be a problem and will gain us so much space in the bathroom.
If you’ve been following me on Instagram, you may have seen some of the “sneak peeks” as we’ve been working on it. Over the next few weeks, I’ll be sharing our bathroom renovation with you. After it’s complete, I’ll show you how I’m going to organize everything for a family of six in a single bathroom.


Thanks for sharing this…we’re having the same problem now.
Oh, no! I hope you don’t have to completely renovate. Best wishes!
I love doing things on a budget. We are putting up with a less than functional bathroom ourselves until we have the money to do it right!
Love what you are doing..and admire you for doing it without debt. Please post as you go so we can admire the work…and in my case, be a little jealous… 🙂
Thanks, Darlynn. I’ll definitely be posting the progress. 🙂
Oh wow Ginny i really give you guys a lot of credit for having the discipline and patience to do this without going into debt. I know when it is done it will be incredible and beautiful and a lot more functional. Keep up the good work and keep us posted. Kudos to your husband also for digging in and working so hard.
So SMART adding a second sink with everyone using this bathroom. I’m sure you’ll love your new space!
I LOVE your vision and how it turned out! It’s great to work within our means, isn’t it? Can’t wait to see all the pics!
Ginny- got on to find your link for the duo binder; just ordered 2! I’ve looked around in stores but can’t find anything similar : ). Thank you! I think they will help me organize current medical papers and notes at the Dr. office.